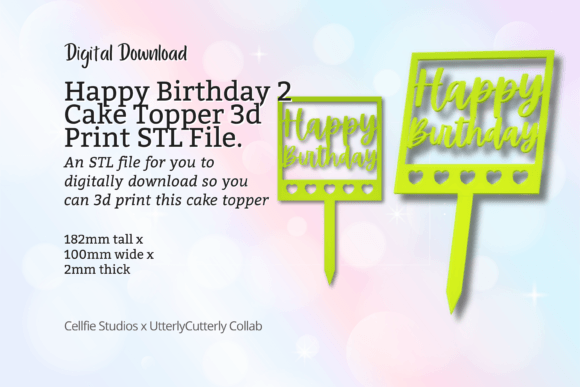
Happy Birthday Cake Topper 1: A Guide to Printing the Perfect Celebration Accessory
Celebrations are defined by the details. While the cake itself is often the centerpiece of a birthday party, the topper is what transforms a standard dessert into a personalized statement piece. The Happy Birthday Cake Topper 1 offers a modern, sleek aesthetic that appeals to both DIY enthusiasts and small business owners looking to elevate their product offerings. However, moving from a digital file to a flawless physical object requires more than just hitting "print." Many users encounter avoidable pitfalls when working with 3D printed accessories, ranging from structural fragility to poor surface finish.
This guide explores how to maximize the quality of your print, avoid common technical errors, and understand exactly what you are purchasing when you buy a digital STL file. By understanding the nuances of this specific design, you can ensure your final product adds the intended extravagance to any celebration.
Understanding the Digital Nature of the Product
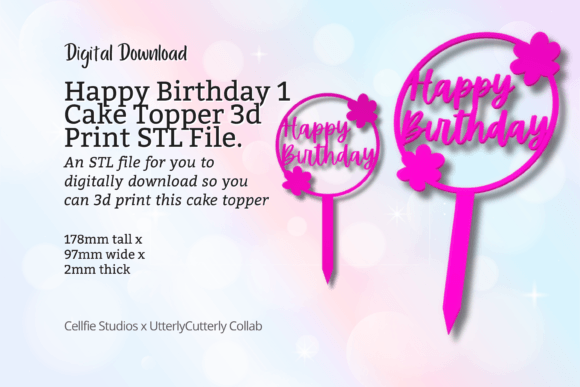
The most frequent misunderstanding among new buyers is the nature of the transaction. When you purchase the Happy Birthday Cake Topper 1, you are acquiring a digital download, not a physical item. Nothing will be shipped to your door. This distinction is crucial for planning. If you need a topper for a party happening tomorrow, buying an STL file is not the solution unless you already have immediate access to a 3D printer and the necessary filament.
This model is designed for versatility. It serves as a great gift for home use, a fun project for hobbyists, or a inventory item for entrepreneurs who sell physical prints. Because it is a digital-only product, returns and exchanges are generally not accepted once the file has been downloaded. Therefore, verifying your printer’s capabilities before purchasing is a critical step in avoiding dissatisfaction.
Common Printing Mistakes and How to Avoid Them
Even with a high-quality STL file, the output depends heavily on your hardware and slicer settings. Here are the most common issues users face and how to correct them.
Ignoring Nozzle and Speed Constraints
The designer recommends specific settings to ensure the best results: a 0.4mm nozzle and a print speed of 150 mm/sec. Ignoring these recommendations can lead to significant quality degradation. Printing too fast with a larger nozzle may result in layer shifting or poor adhesion, causing the delicate letters of the "Happy Birthday" text to warp or break. Conversely, printing too slowly can cause heat buildup, leading to stringing and oozing that ruins the clean lines of the design.
Better Approach: Always start with the recommended baseline settings. If your printer struggles at 150 mm/sec, reduce the speed incrementally rather than changing the nozzle size immediately. Ensure your cooling fans are at maximum efficiency to solidify the layers quickly, which is vital for overhangs often found in text-based toppers.
Overlooking Dimensions and Scale
The Happy Birthday Cake Topper 1 measures 97mm x 179mm x 2mm. A common error is assuming the file will automatically fit any cake size. At nearly 18 centimeters wide, this is a substantial topper suitable for medium to large cakes. Placing it on a small cupcake or a petite 6-inch cake will overwhelm the dessert visually. Additionally, the 2mm thickness provides rigidity but requires careful handling during removal from the print bed.
Better Approach: Measure your cake board or top surface before printing. If you need a smaller version, check if your slicer allows for uniform scaling, but be aware that reducing size too much may compromise the structural integrity of the thin connecting parts between letters.
Neglecting Bed Adhesion and Support
Given the flat and wide nature of this design, warping can be an issue if the bed adhesion is insufficient. Users often skip using a brim or raft, assuming the large surface area is enough. However, if the corners lift, the entire topper becomes unusable. Furthermore, while the design is optimized for easy printing, some slicers may generate unnecessary support structures inside the loops of letters like 'B' or 'O', leaving difficult-to-remove marks.
Better Approach: Use a brim of at least 5-10mm to secure the edges. Check your slicer’s preview mode to see if supports are generated. If they are, adjust the support threshold or use tree supports if available to minimize contact points on the visible surfaces.
Material Selection for Food Safety and Durability
While the STL file ensures the shape, the material determines the safety and longevity of the topper. Many beginners default to whatever filament they have on hand, such as standard PLA. While PLA is easy to print, it is not inherently food-safe due to potential bacteria growth in layer lines and the presence of additives in the filament.
Practical Advice: If the topper will directly touch the cake or frosting, consider using a food-safe barrier. You can insert the topper into a small plastic pick or wrap the base in food-grade plastic. Alternatively, use PETG, which is more durable and resistant to moisture, though you must still ensure the specific brand certifies food safety. For purely decorative purposes where no direct contact occurs, standard PLA is perfectly adequate and offers a wide range of colors to match party themes.
Maximizing Value for Resellers and Creators
For small business owners, the Happy Birthday Cake Topper 1 represents a low-cost, high-margin product. However, consistency is key to building a reputation. One bad print can lead to negative reviews. To maintain quality:
- Standardize Your Process: Save the successful slicer profile as a preset. Do not tweak settings for every single print unless necessary.
- Post-Processing: Spend time removing brims and sanding any minor imperfections. A clean finish justifies a higher price point.
- Batch Printing: Since the design is flat, you can often fit multiple toppers on a single print bed if you have a larger printer, reducing electricity and time costs per unit.
Final Checks Before You Print
Before committing to a full print run, perform a test print. All designs in this store are tested, but your printer is unique. Check the following:
- File Integrity: Open the STL in your slicer and inspect for mesh errors.
- Layer Height: A layer height of 0.2mm is usually a good balance between speed and detail for this type of accessory.
- Infill: Since the topper is thin (2mm), 100% infill or a high-density grid is recommended to prevent snapping during insertion into the cake.
By approaching the Happy Birthday Cake Topper 1 with a clear understanding of its digital nature, dimensional constraints, and printing requirements, you can avoid common frustrations. Whether you are creating a memorable moment for a loved one or expanding your product line, attention to detail in the printing process ensures the final result matches the modern, fun aesthetic promised by the design.