Mastering the 3D Gumball Machine Candy Holder: A Practical Guide for Crafters
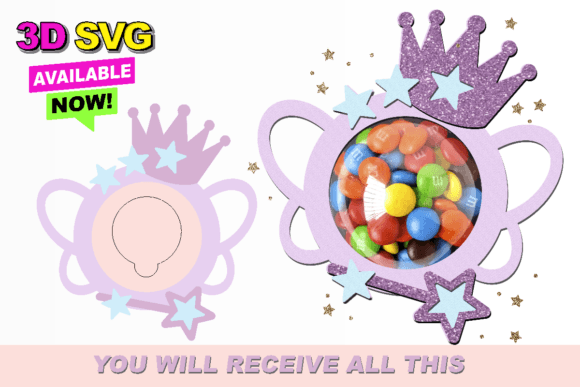
The charm of a retro Gum Ball Machine Candy Holder is undeniable. It evokes nostalgia, adds a pop of color to any party table, and serves as a functional centerpiece that doubles as a favor box. However, moving from a digital design file to a sturdy, three-dimensional physical object requires more than just hitting "print" or "cut." Many creators rush into this project, assuming that because the file is labeled as "easy," the execution will be flawless. This assumption often leads to wasted materials, frustration, and a final product that looks flimsy rather than professional.
Whether you are a seasoned entrepreneur selling at craft fairs or a hobbyist preparing for a child’s birthday party, understanding the nuances of this specific cut file is crucial. The download typically includes an SVG in a zipped folder, designed for compatibility with major platforms like Silhouette Studio and Cricut Design Space. Yet, compatibility does not guarantee success. Let’s explore the common pitfalls users encounter and how to navigate them effectively to ensure your candy holder stands out for all the right reasons.
Understanding File Compatibility Beyond the Label
One of the most frequent misunderstandings involves file formats. While the product description highlights that the SVG works seamlessly with Cricut and Silhouette machines, users with other cutting devices often overlook the technical requirements. If you are using a different brand of cutter or a laser engraver, you must verify that your software can interpret the vector paths correctly. An SVG is scalable, but it relies on clean nodes and paths. Poorly optimized files can cause your machine to stutter, cut incomplete lines, or misinterpret overlapping shapes.
The Mistake: Assuming all SVGs are created equal and skipping the pre-cut preview step.
The Fix: Always open the file in your specific software before loading your material. Check for stray points or disconnected lines. If you are using a machine other than Cricut or Silhouette, convert the file if necessary, but always inspect the converted version. A quick test cut on scrap paper can save you from ruining expensive cardstock or vinyl. This simple step ensures that the intricate details of the gumball machine’s dome and base align perfectly during assembly.
Material Selection: Strength vs. Aesthetics
A gumball machine holder needs to support weight. Unlike a flat greeting card, this is a structural item. A common error is choosing paper based solely on color or pattern, ignoring its grammage (weight) and rigidity. Standard printer paper or lightweight scrapbook paper will buckle under the weight of even a few candies, causing the structure to collapse or look distorted.
For best results, opt for cardstock that is at least 65lb to 80lb in weight. If you are aiming for a translucent effect to mimic glass, consider using acetate sheets for the dome section, while keeping the base in sturdy cardstock. This combination provides visual appeal without sacrificing structural integrity. Remember, the goal is a holder that looks robust and premium, not one that crumples when picked up.
Precision in Cutting and Scoring
The difference between an amateur-looking craft and a professional-grade item often lies in the scoring. The Gum Ball Machine Candy Holder design likely includes fold lines that are essential for creating its 3D shape. Many beginners confuse cut lines with score lines, or they fail to adjust their machine’s pressure settings appropriately.
- Cut Lines: These should go all the way through the material. Ensure your blade is sharp and the depth is set correctly.
- Score Lines: These should indent the paper without cutting through. If you cut through a score line, the fold will be weak and may tear during assembly.
If your machine allows, use a dedicated scoring tool or wheel. If you are using a blunt blade to score, reduce the pressure significantly. Test these settings on a scrap piece of the same material first. A crisp, clean fold makes assembly infinitely easier and results in sharper edges, giving your candy holder a polished appearance.
Assembly Techniques for Durability
Once the pieces are cut, the assembly process begins. Here, impatience is the enemy. Rushing the gluing process can lead to misalignment, visible glue residue, or joints that pop open later. Use a precision applicator for your adhesive, such as a fine-tip glue bottle or double-sided tape runners for cleaner application.
Pro Tip: Allow the glue to become tacky for a few seconds before pressing pieces together. This prevents the paper from sliding around while you position it. For the curved sections of the gumball machine, hold the joint firmly for at least thirty seconds to ensure the bond sets. If you are producing these in bulk for a business, consider creating a jig or template to hold the pieces in place while the glue dries. This consistency improves efficiency and ensures every unit meets your quality standards.
Customization and Personalization
While the base design is charming, customization is what makes your project unique. However, adding too many embellishments can compromise the structure. Avoid heavy adhesives like hot glue guns on thin paper areas, as the heat can warp the material and the weight can pull joints apart. Instead, use lightweight decorations such as printed labels, washi tape, or light die-cuts.
Consider the theme of your event. For a baby shower, pastel colors with soft ribbons work well. For a corporate event, stick to brand colors with minimalistic design elements. The versatility of the SVG format allows you to resize the holder if needed, but remember that resizing affects the proportion of tabs and slots. Always check the fit after resizing to ensure the pieces still interlock or glue together correctly.
Final Checks Before Full Production
Before committing to cutting twenty or fifty units, make one complete prototype. Assemble it fully, fill it with the intended candy or favors, and test its durability. Shake it gently. Does it hold? Do the seams stay closed? Is it easy to open and close if designed to do so? This prototype phase is invaluable. It reveals any design flaws or material issues that weren't apparent on the screen.
By taking the time to understand the file, choose the right materials, and execute precise cuts and folds, you transform a simple digital download into a tangible, high-quality product. The Gum Ball Machine Candy Holder is more than just a container; it is an experience. Treat the creation process with care, and your final result will reflect that attention to detail, delighting recipients and enhancing your reputation as a skilled creator.